Using the Web UI
OpenCCU-Loom ships a browser-based Config UI for inspecting your CCUs, browsing devices, changing values, and configuring devices — no command line needed. This page is a tour of what you can do there.
Who this page is for
End users who want to manage their Homematic devices from a browser. No Go knowledge or API experience required.
Opening the UI
By default the web UI listens on port 8119. In a browser on the same network, open:
First run
The very first time you open the UI, there is no account yet. You are sent to the first-run setup page at /setup, where you create the initial administrator account.
After that, future visits go through the login page at /login.
Logging in
OpenCCU-Loom supports several sign-in methods (local accounts, sessions, and optionally OIDC single sign-on). Which ones are available depends on how the daemon was configured. For the details of accounts, roles, and OIDC, see Authentication.
Tip
If the page does not load at all, the rich Svelte app may not be built into your binary. A minimal fallback page is served instead and points you back to the same address. In that case check your install per Getting started.
What the UI lets you do
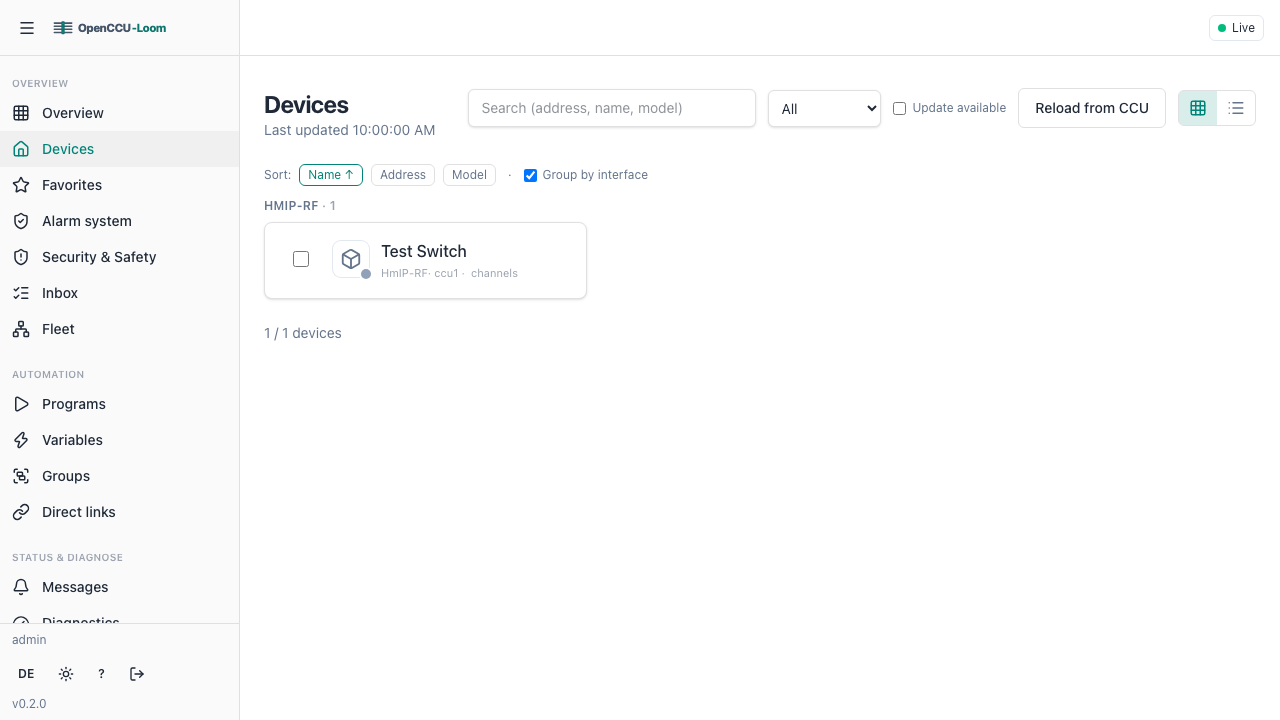
The app is organised into views. The main ones, and the everyday tasks they cover:
| View | What you do there |
|---|---|
| Overview | Landing dashboard: at-a-glance daemon and CCU status. |
| Favorites | Quick access to the devices you pin as favorites. |
| Devices | Browse all devices across your CCUs, drill into channels and parameters. |
| Device detail | Inspect one device, read and change its data points, and configure it. |
| Fleet | Fleet-wide view across every configured CCU. |
| Energy | Monitor power and energy readings from measuring devices. |
| Radio & battery | Review per-device radio signal strength (RSSI), battery level and reachability. |
| Matter | Enable exposure of devices to Apple Home / Google Home / Alexa and pair. |
| Diagnostics | Check health and troubleshooting information. |
| Backups | Manage configuration backups. |
| Firmware | View device firmware status. |
| Inbox / Messages | See pending notices from your CCUs. |
| Programs / System variables | Browse CCU programs and system variables. |
| Audit log | Review what changes were made and by whom. |
| Log viewer | Follow the daemon's live log stream (see Installation & First Steps). |
| Settings | Adjust daemon and UI settings, including the interface theme (light / dark / system — the same preference the sidebar toggle cycles), users and API tokens, and the hidden parameters to reveal. |
The sections below cover the tasks most users do.
Browsing devices, channels, and parameters
Open the Devices view to see every device OpenCCU-Loom has discovered across all configured CCUs. If you run more than one CCU, devices are grouped by their CCU name (the central_name).
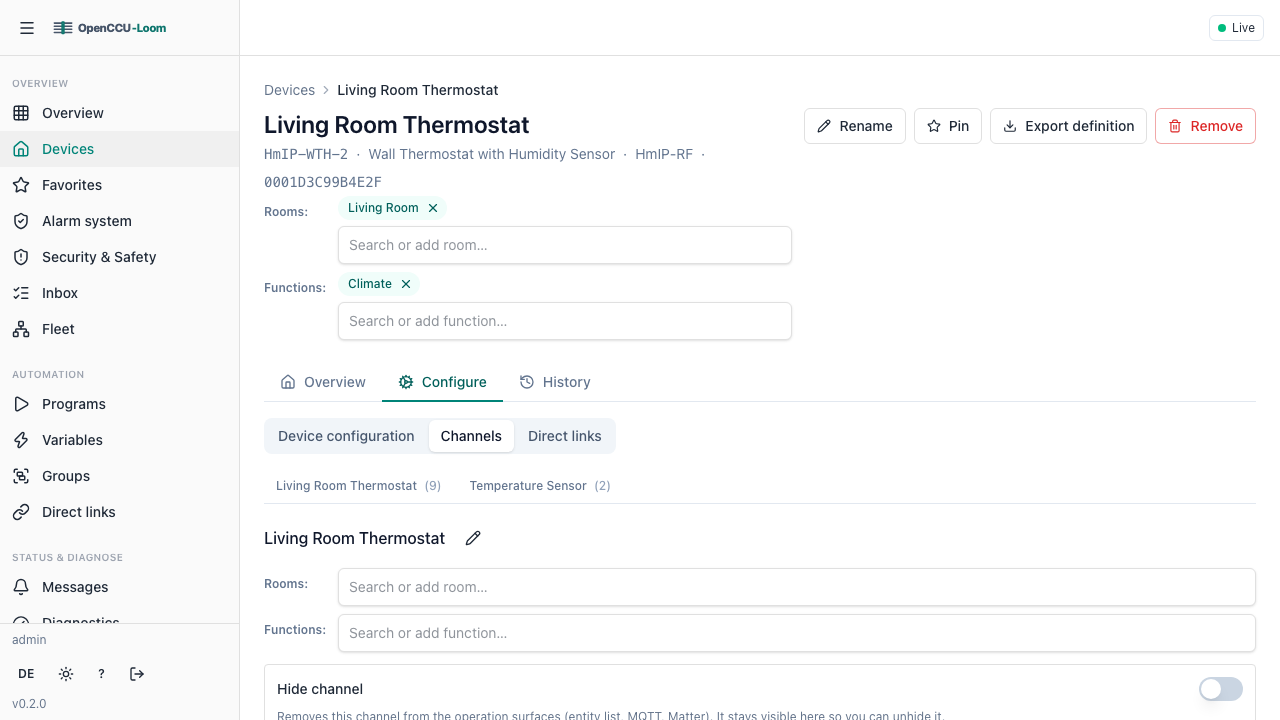
Selecting a device opens its detail view, where you can:
- See the device's channels.
- Open a channel to list its data points (parameters such as
STATE,LEVEL,TEMPERATURE). - Read the current value of each data point.
If you are unsure what "device", "channel", and "data point" mean, read Core concepts first.
Changing a value
For writable parameters, the UI gives you a control (a toggle, a slider, an input field) to set a new value. When you confirm, OpenCCU-Loom sends the change to the CCU and the device reacts.
Behind the scenes this is a single write to the parameter (PUT /api/v1/devices/{address}/channels/{channel}/data-points/{parameter}/value); you do not need to call it yourself — the control does it for you.
Warning
Writing a value actuates a real device. Make sure you are changing the device you intend to before you confirm.
Configuring a device (paramsets)
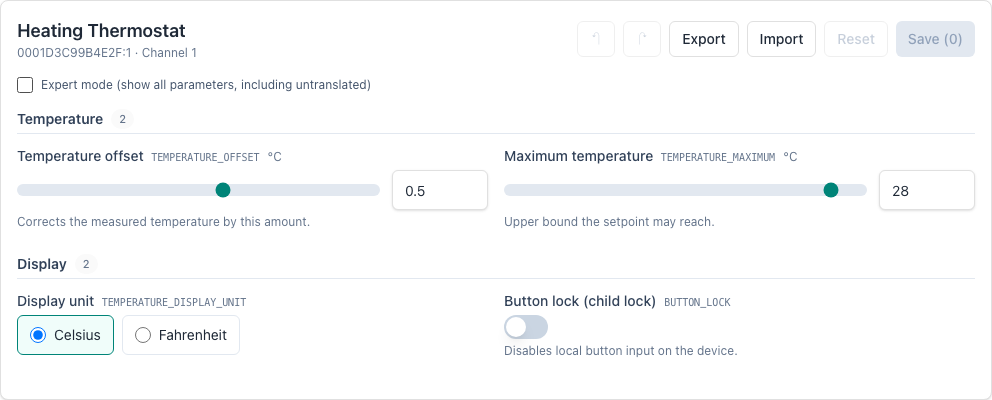
Beyond live values, many devices have configuration parameters (the device's settings, as opposed to its current state). The UI presents these as editable forms per channel, with sensible grouping and labels.
You can also export a channel's configuration and import it again, which is handy for copying settings between similar devices. These map to the channel config export/import endpoints (GET .../config/export and POST .../config/import).
Showing hidden parameters (un-ignore)
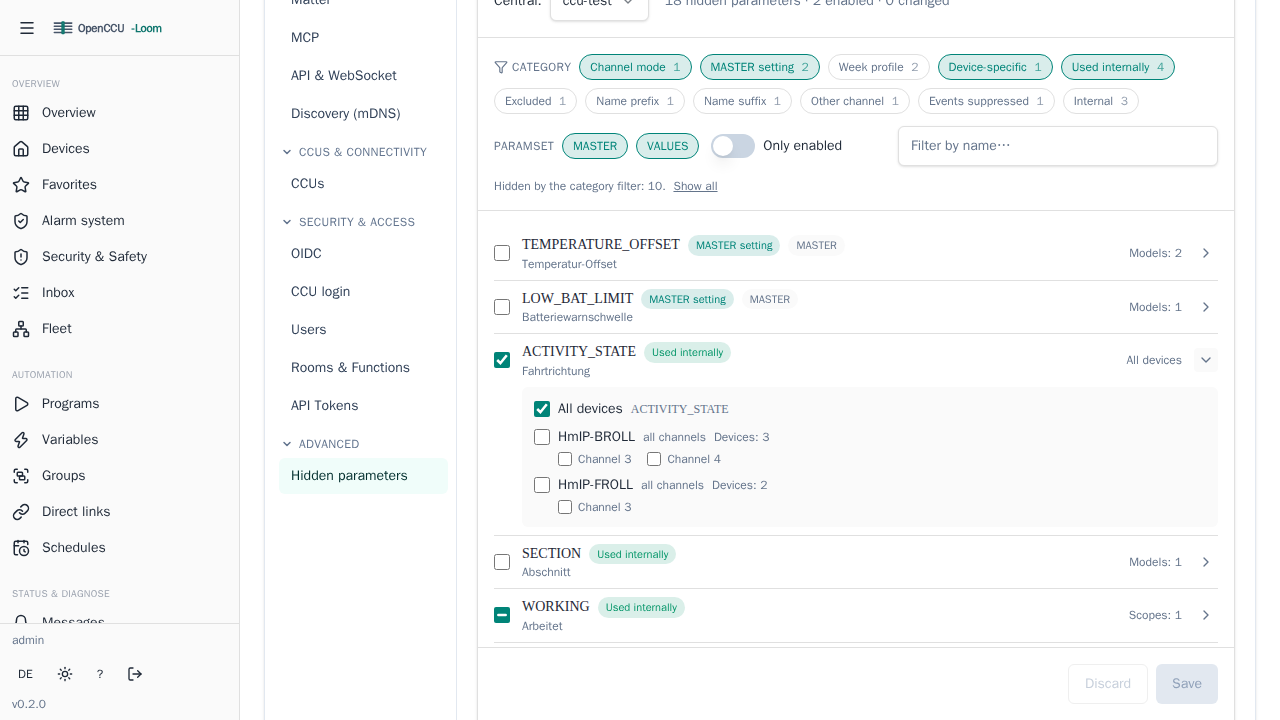
Some parameters are hidden by default to keep views clean — see parameter visibility. Settings → Advanced → Hidden parameters lists what is currently hidden and lets you switch individual parameters back on.
The list shows one row per parameter, not one row per device. A large installation hides only a few dozen distinct parameters, but each of them occurs on many device models and channels — so the row is the parameter, and you open it to choose where it applies.
- Open Settings and pick the Hidden parameters tab.
- Find the parameter you need — type part of its name, its translated label, or a device model into the search box.
- Switch it on with the checkbox at the start of the row. That enables it for every device.
- To be more selective, expand the row with the chevron on the right and tick a single device model, or a single channel of that model.
- Click Save.
If you cannot find a parameter
Most hidden parameters are internal plumbing — diagnostic bits, service values the CCU marks as internal, and the individual cells of week profiles. Those categories start collapsed, so the list opens on the parameters that are usually worth a decision.
A line under the filter tells you how many rows are currently hidden and offers Show all. You can also click the category chips to filter to exactly the categories you want; each chip shows how many parameters it holds.
The category on each row names the rule that hid the parameter:
| Category | Meaning |
|---|---|
| Channel mode | The channel's operation mode excludes it. Changing the mode reveals it without an un-ignore entry — usually the better fix. |
| MASTER setting | A configuration value outside the list of MASTER parameters shown by default. |
| Week profile | One cell of a week profile (P1_ENDTIME_MONDAY_1, 01_WP_LEVEL). A single thermostat has hundreds; edit the profile in the schedule editor instead. |
| Used internally | The value exists and is used elsewhere — a maintenance channel or a combined data point — but is not shown on its own. |
| Device-specific | Suppressed for this device model in particular. |
| Excluded, Name prefix, Name suffix | On the built-in exclusion list, or matching a suppressed name pattern such as *_STATUS, *_RESULT, ERR_TTM_*. |
| Internal, Diagnostic bit | The CCU marks it as an internal service value, or it is a read-only bit the CCU never reports on its own. |
Three-state checkboxes
A row's checkbox has three states: empty (off), checked (on for every device), and a dash (on for some device models or channels only). The right-hand column tells you which — All devices, or how many scopes are active.
Patterns without a matching parameter
If you previously enabled a parameter that no device in your installation carries any more — a device you removed, or a hand-typed entry with a typo — it appears in a separate Patterns without a matching parameter list at the bottom instead of disappearing. Saving never drops those silently; remove them yourself with the ✕ button.
Once un-ignored, the parameter shows up in the device's data-point list and is published to MQTT, REST, and the other north-bound bridges like any other data point.
Charts and measurement history
The device detail view has a History tab that charts a data point's recorded values over time — handy for seeing how a temperature, humidity, or power reading moved across a day or week.
Measurement history is opt-in: nothing is recorded until you enable it (persistence.history in the configuration). Once on, the daemon stores samples in a separate history.db and the History tab plots them; before that the tab has nothing to show.
Health and diagnostics
The Diagnostics view shows the daemon's overall health and connection status to each CCU and interface — useful when a device seems unresponsive or a CCU dropped offline. There is also a server-rendered /health page if you only need a quick up/down check.
For deeper operational topics (log levels, captures, metrics), see Observability.
Where to go next
- Getting started — install and first run.
- Authentication — accounts, roles, and OIDC.
- Core concepts — the device model in plain language.
- Multi-CCU — running several CCUs at once.